We love Domino’s garlic bread more than the pizza they offer and I tried replicating it at home.
This is an easy recipe, the only special thing this garlic bread needs is TIME !!! 90 minutes, to proof that is and then yum yum yum, comes out heavenly.

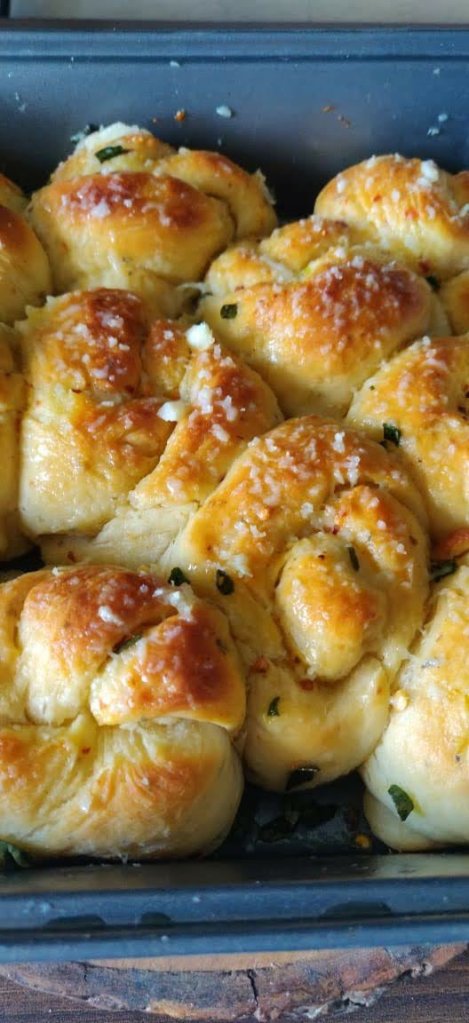
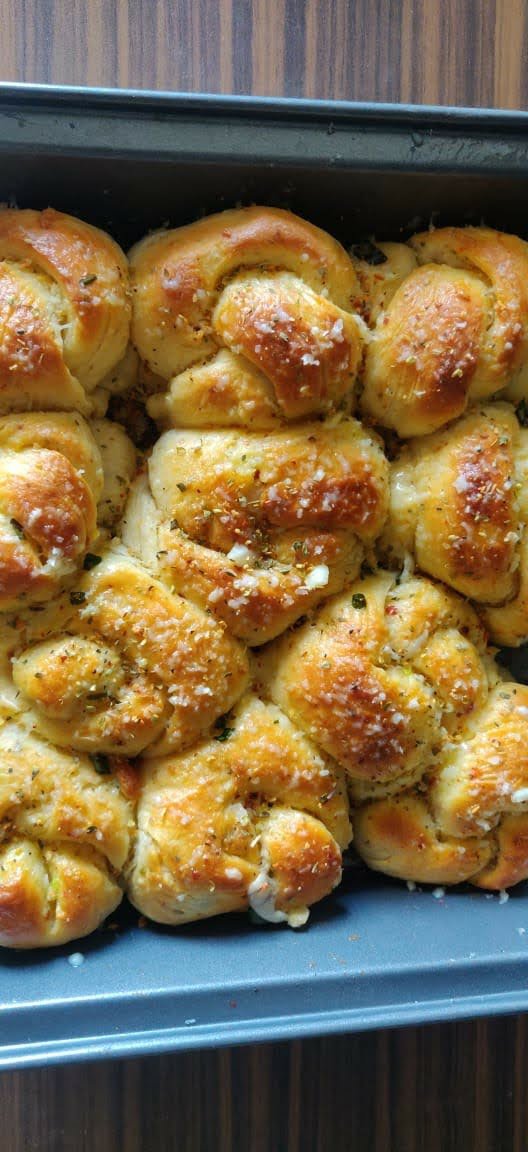
Garlic breadsticks is an all time favorite at our place and here’s how anyone can make it at home with ease and that too from scratch.
This recipe yields 2 portions of garlic breadsticks or around 14 garlic knots.

Attention: Calorie conscious people, make it at your own risk 😉
The more butter you add in the end while serving, the more delicious it’s going to be.
Control the amount of yeast though because sometimes it smells a lot yeasty and that’s not what we want. These Garlic breadsticks go beautifully with soups as well, or pair it with a super creamy pink pasta, else have it on it’s own and you will love life…mmm…I love it to the core.
For an easy and delicious lunch, you can make these garlic breadsticks/ garlic knots, some chicken pasta and these delicious Peanut Butter Blossom cookies ( Recipe by the very talented Kathryn of braisedinakitchen) for satisfying that sweet craving 😋

So let’s start,
INGREDIENTS:
- Maida or All-purpose flour : 2 cups ( used these cup measures)
- Milk Powder : 1 Tbsp
- Active dry yeast : 1 tsp
- Warm milk and water mixed in equal quantities : 1 cup
- Sugar : 2 tsp
- Garlic minced (medium size) : 6 cloves
- Olive oil : 1 Tbsp or as required
- Butter and garlic mixture: 50 gms butter and 4 grated cloves of garlic
- Salt : 1 tsp or according to taste.
- Oregano or pizza Seasoning : 1 Tbsp
- Cornmeal : 2 tsp (optional)
DIRECTIONS:
Mix in the dry yeast, warm milk water combo, and sugar. Mix properly.
Cover the vessel with a towel (as yeast prefer to work in the dark) and put aside for 5 minutes for the yeast to activate, after the bubbles starts appearing, the yeast is activated.
(Note: The Milk water combo should be lukewarm, if the water is too cold the yeast will not “wake up.” If the water is too hot, you run the risk of killing the yeast. Make sure the amount of milk water combo you use is not greater than the amount you need to make the dough)
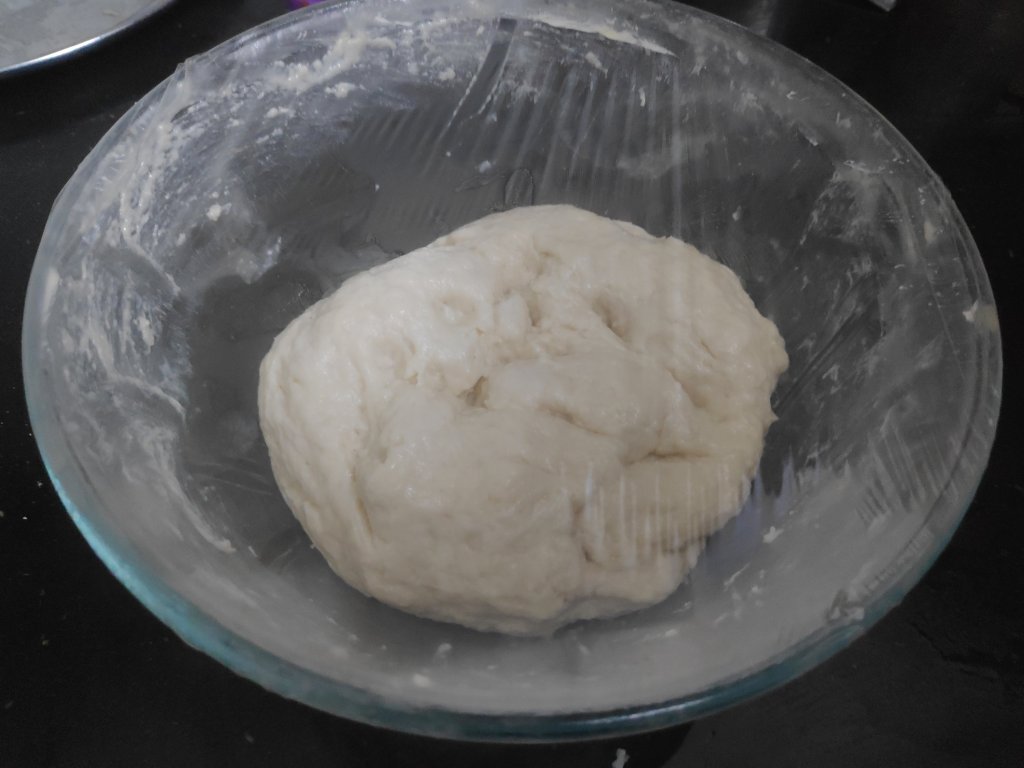
Now, To the Maida, add salt and Milk powder and mix properly. Now make a well in the flour mixture and pour the yeast liquid slowly. Mix well and make a soft dough. Knead it for 15 – 20 minutes to develop gluten. I follow this video for kneading.
Use Olive oil to smoothen the dough. Now add minced garlic and oregano seasoning and work up the dough again.
(The resulting dough should be stretchy and soft)
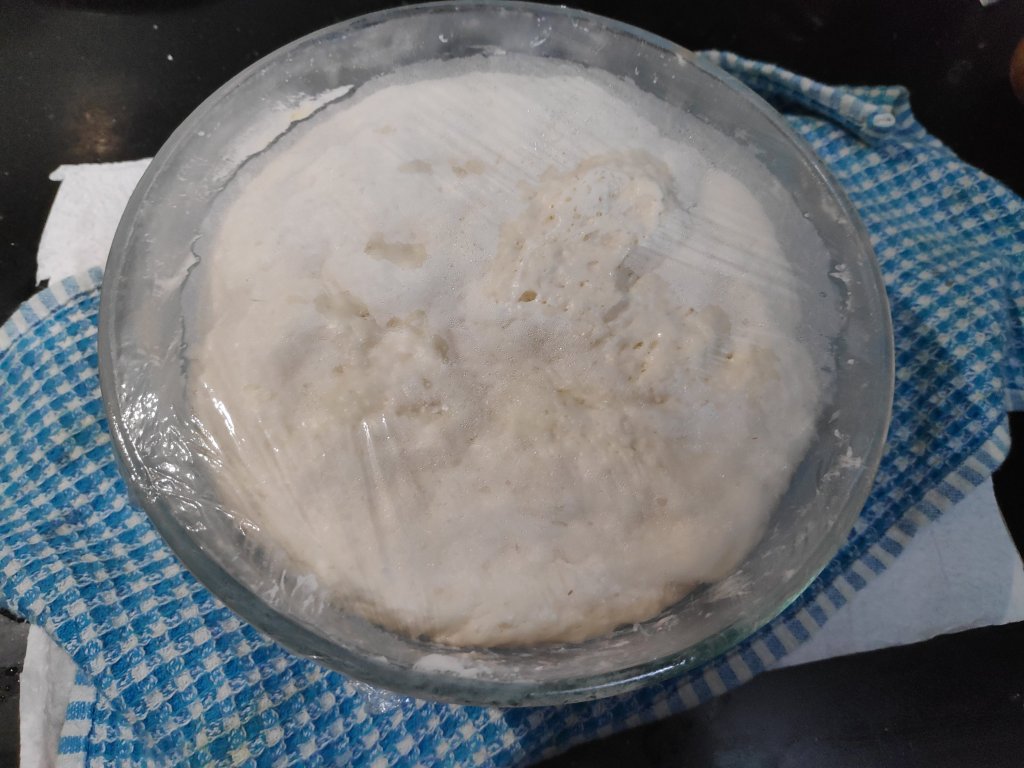
Apply some olive oil in a container and put the dough. Cover it with a cling film and put a tea towel over it and place in a warm place for 90minutes- 2 hrs. It should double up in volume.
Now after 90 minutes, Take the dough out and punch it slightly to de-gas. Sprinkle some maida on a board and work up the dough, knead for 2 minutes again. You can add chili flakes also.
Preheat the oven to 200 degree Celsius.
Divide the dough in 2 parts, sprinkle some corn meal(optional) or maida and roll out the dough in a thick chapati shape. Do not roll it very thin, it should be at least ½ cm thick.
Apply some butter and garlic mix in the middle to half of the chapati and fold to make a semi-circle.
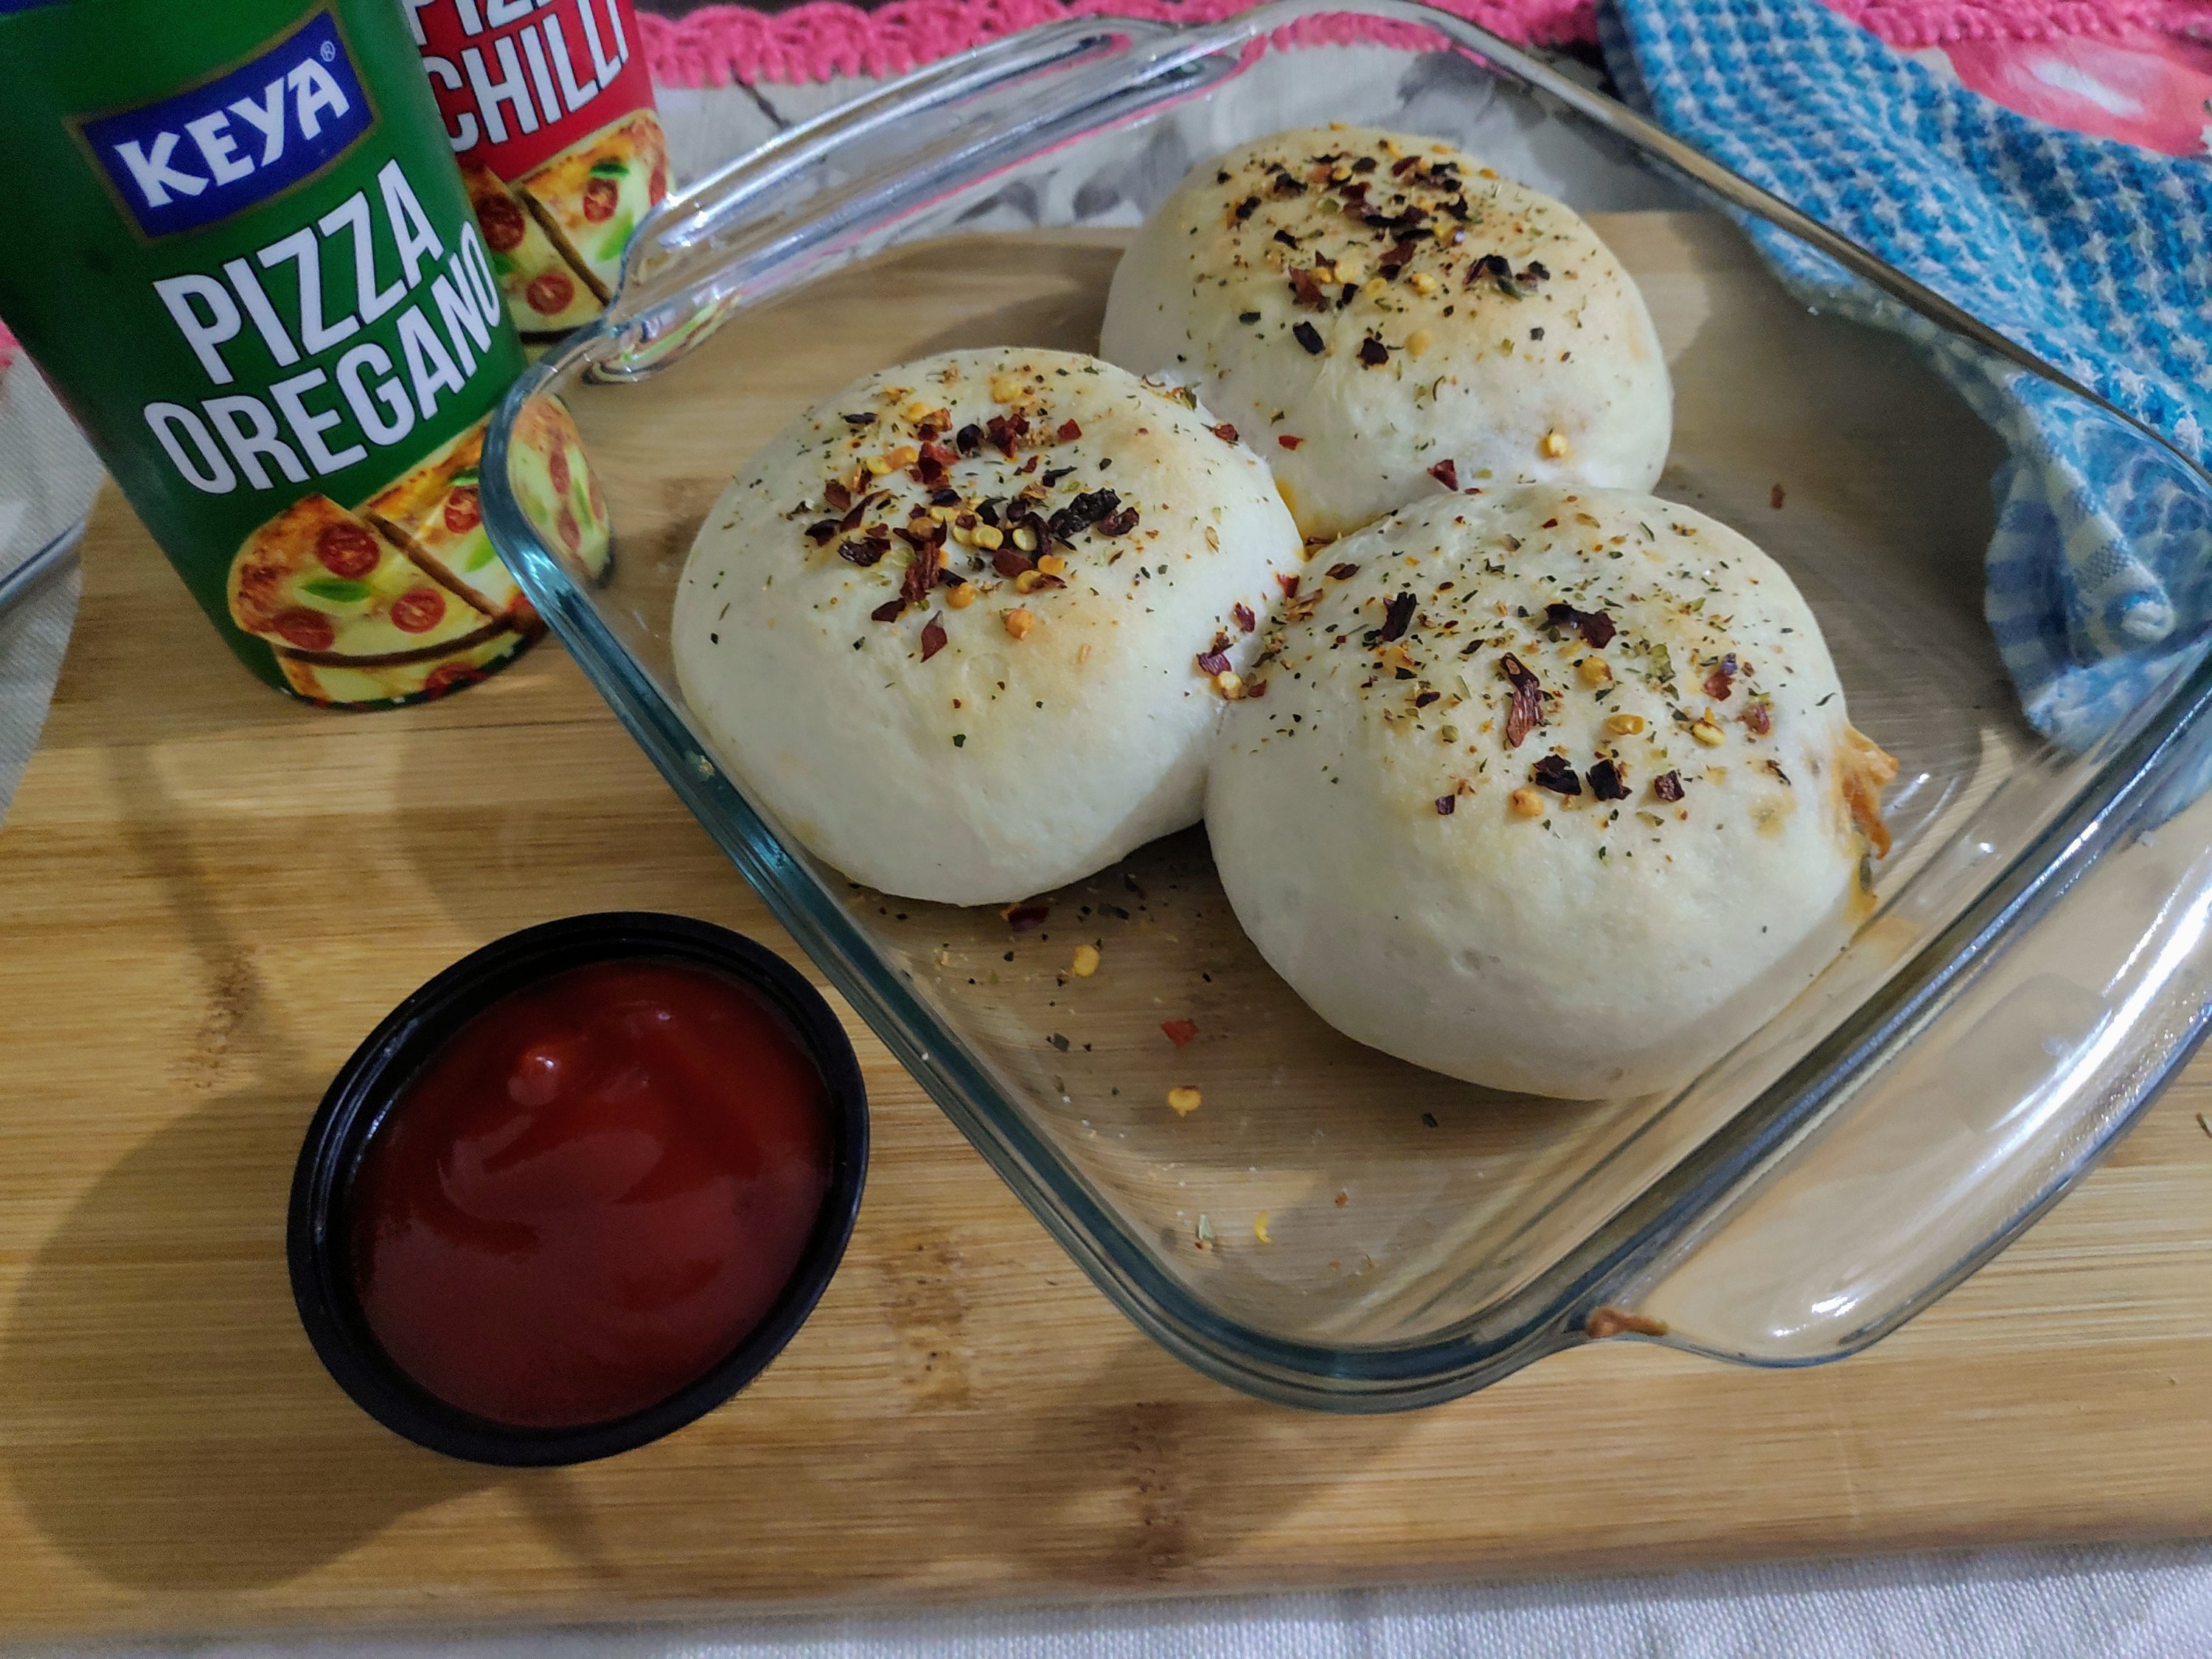
For stuffed garlic bread, just add a mixture of boiled corn, chopped jalapeno and some grated cheese after applying butter.
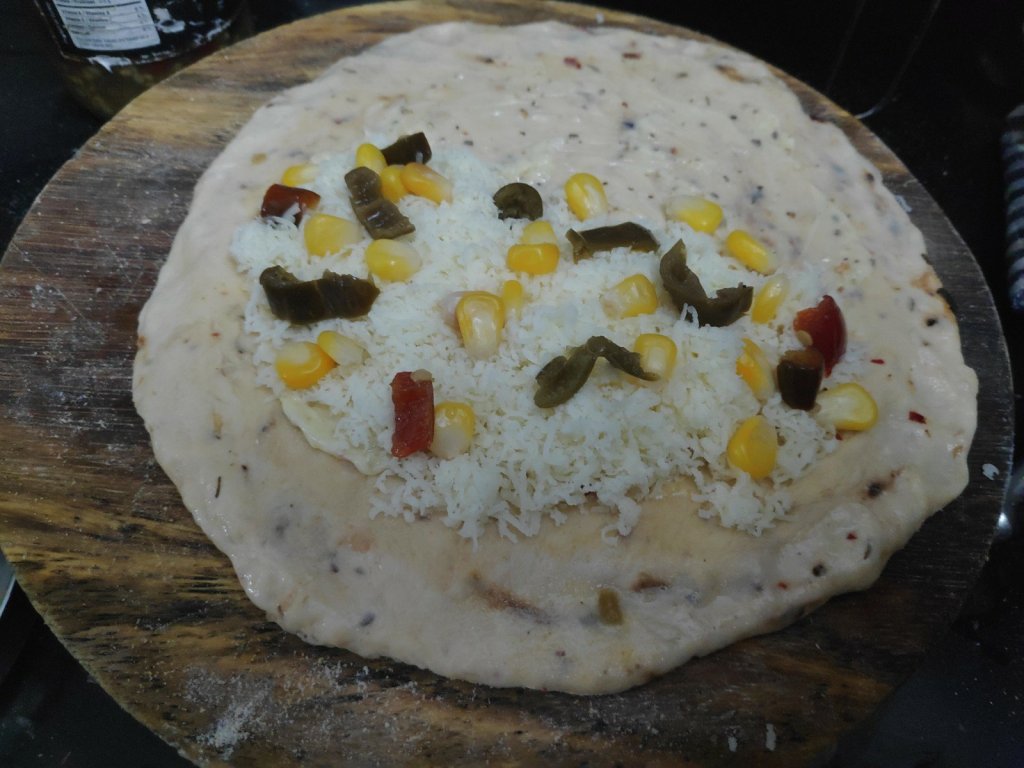

(Note: Applying a lot of butter will separate the two layers so apply very less butter inside and pinch the sides so that it does not open.)
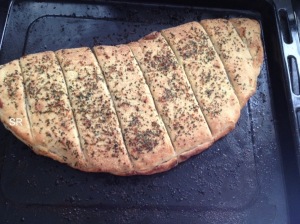
Now on a baking tray, apply some butter, sprinkle lots of oregano seasoning.
Remove excess of corn meal from the rolled out dough and transfer to the tray.
Apply some more butter over the dough, sprinkle some oregano and chili flakes (optional) and Cut the dough into bread sticks, but do not cut all the way down and bake at 180 degree Celsius for about 15 minutes or till done.
Take out, and put 2-3 tsp of melted butter evenly and let the butter seep in.
Enjoy !
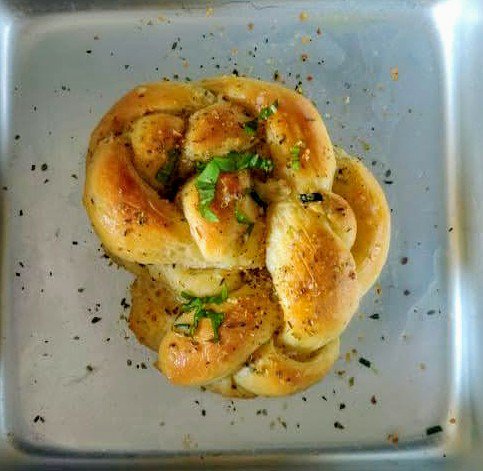
This same dough can be used to make garlic knots or stuffed garlic buns.
I followed this video for making these garlic knots. Very simply just roll some dough in a log and make a knot.

Hi,
I’d like to invite you to join our site http://www.erecipe.com . I really enjoy your blog and recipes and I think the over 8,000 unique daily visitors to eRecipe will too.
By joining eRecipe, we will provide the Nutrition Facts for every recipe you post in which you could customize and add to your blog. Viewers need and love to know the nutritional facts. Its a free service that we offer to blogs and recipes we really love. It looks professional and your members will love it.
Simply visit http://www.erecipe.com or contact me at erecipe00@gmail.com. We look forward having you in our network!
Best,
Michelle
LikeLike
Your blog is impressive, thanks to the quality of your recipes & other content. We would be glad if you would participate on Contestchef so that your quality recipes can contest with other such bloggers/ recipe creators and win accolades from various players in the global food industry.
Contestchef is a global forum for food/ recipe bloggers to showcase their skills to the world. This is a one of a kind concept and backed by food conglomerates around the world. Several recipe creators/bloggers are already contesting on Contestchef.
Click to join Contestchef
Sincerely,
Nandy
Contestchef
LikeLike
Wonderful collection Shaheen.
LikeLike
Yummm
LikeLike
Wow! Love all these delightful treats! I wish I could bake all these goodies with such a finesse. 🙂
LikeLike
Thanks dear❤️❤️
LikeLike
Wow🥰🥰🥰
LikeLike
Love your blog so much! I really hope you like mine too but I feel like yours is very unique and thoughtful!
LikeLike
Thank you so much dear, I will be a regular on your blog👍😀
LikeLike
🙂
LikeLike